Get 50% OFF QuickBooks for 3 months*

Buy now
Switch to QuickBooks and 70% off for 3 Months
July 22, 2025
Solved

Invoice via EM - Customer Name Missing Data

  • July 22, 2025
  • 1 reply
  • 9 views

When I invoice a customer and send an email via QuickBooks, the full customer name does not automatically appear in the email.  However, when I look at the invoice, the full customer name is listed.

For Example:  Customer Name:  Wilson Law Firm

Email state : Dear Wilson (Missing words Law Firm)


Is there a way to correct this vs manually?
 

Best answer by MichaelaS

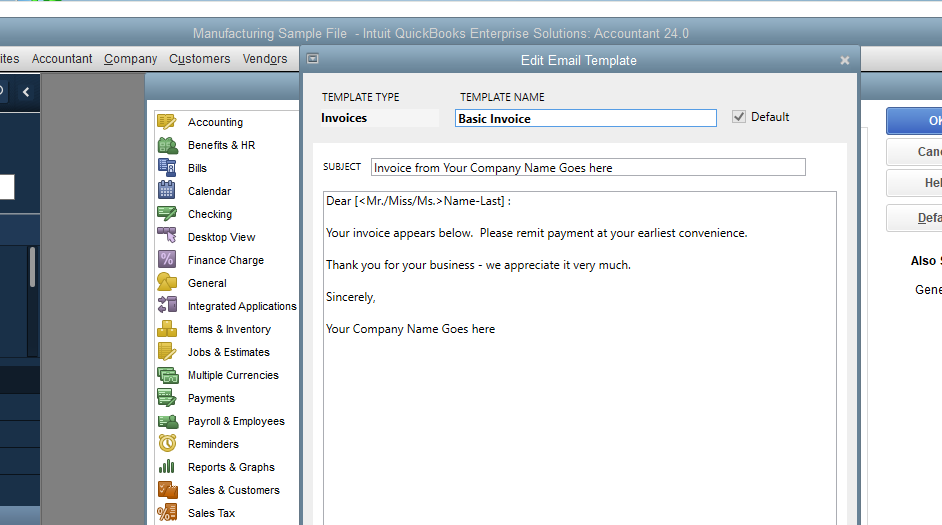
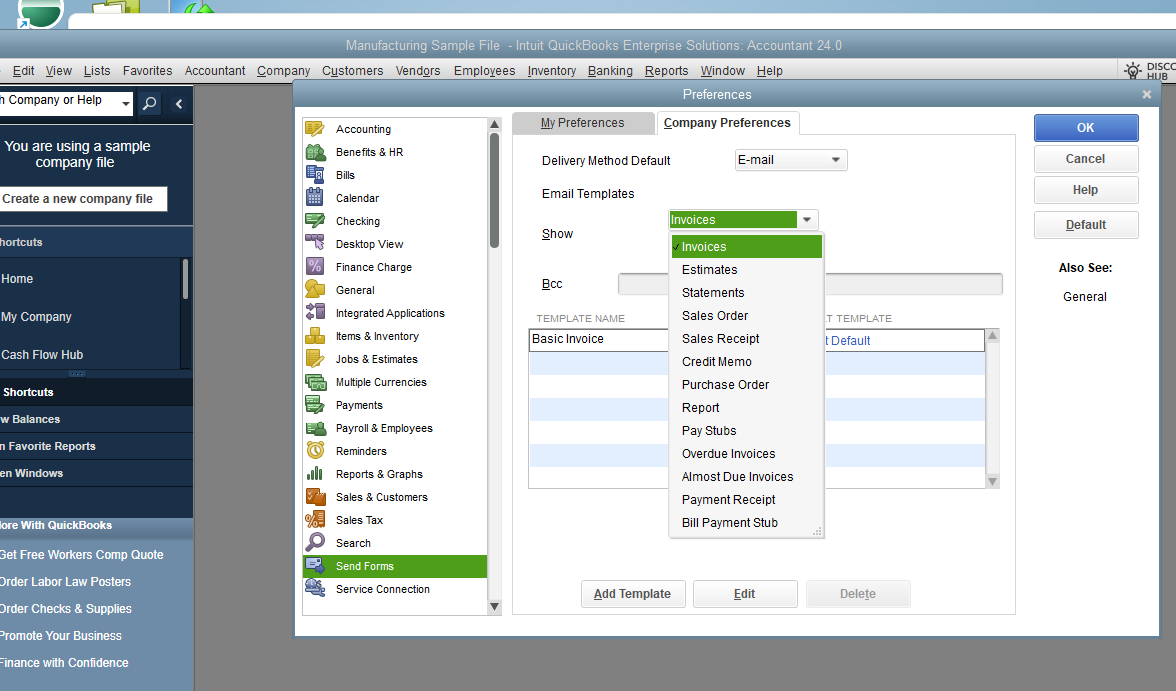
Thank you for your inquiry regarding invoice email, TR-2025. Please note that the customer's full name does not automatically populate in the invoice email. To ensure the customer's full name appears in the email body, let's manually set the email template used for invoices before sending it to the customer.


Here's how to do it:


  1. Go to the Edit menu.
  2. Tap Send Forms and click the Company Preferences tab.
  3. Ensure that the default delivery method is set to "Email," and select "Invoices" as the email template.
  4. Hit the Template Name used for that specific customer, then click the Edit button below.


  5. Customize the body of the email and tap OK to save.


Please leave us a response if you have other questions or concerns.

1 reply

MichaelaSQuickBooks TeamAnswer
QuickBooks Team
July 22, 2025

Thank you for your inquiry regarding invoice email, TR-2025. Please note that the customer's full name does not automatically populate in the invoice email. To ensure the customer's full name appears in the email body, let's manually set the email template used for invoices before sending it to the customer.


Here's how to do it:


  1. Go to the Edit menu.
  2. Tap Send Forms and click the Company Preferences tab.
  3. Ensure that the default delivery method is set to "Email," and select "Invoices" as the email template.
  4. Hit the Template Name used for that specific customer, then click the Edit button below.


  5. Customize the body of the email and tap OK to save.


Please leave us a response if you have other questions or concerns.