


Your Top 5 QuickBooks Questions Answered - April 2026

Whether you've been using QuickBooks for years or you're still getting your footing, there's always a workflow worth refining. This month's roundup covers everything from automating customer payments to sending receipts after the fact. Let's get into it.
1. Where can I download an ACH form to pass to my customers to fill out?
The great news is that there's no separate ACH form to hunt down and email. QuickBooks Online handles this directly through Autopay, which lets your customers authorize recurring payments electronically right from their invoice.
Here's how it works: once you have a recurring invoice set up with QuickBooks Payments enabled, your customer will see an option to Set up autopay when they open that invoice. They'll sign in with their Intuit account (or create one), confirm the payment schedule, and authorize the automatic charges going forward. Their bank account or card details are entered securely at that point, which means no paper form required.
A few things to keep in mind:
- QuickBooks Payments is required to use Autopay.
- Autopay is only available on recurring invoices totaling $5,000 or less.
- Daily recurring intervals are not supported.
If you do need a paper authorization on file (for example, for recurring sales receipts), QuickBooks does require that you collect and store a written agreement from your customer separately before entering their payment details on their behalf.
Learn how to set up Autopay for recurring invoices
2. How do I categorize a credit card payment?
When you pay off your credit card balance, that transaction needs to be recorded correctly so your books reflect both the reduction in what you owe and the money leaving your bank account.
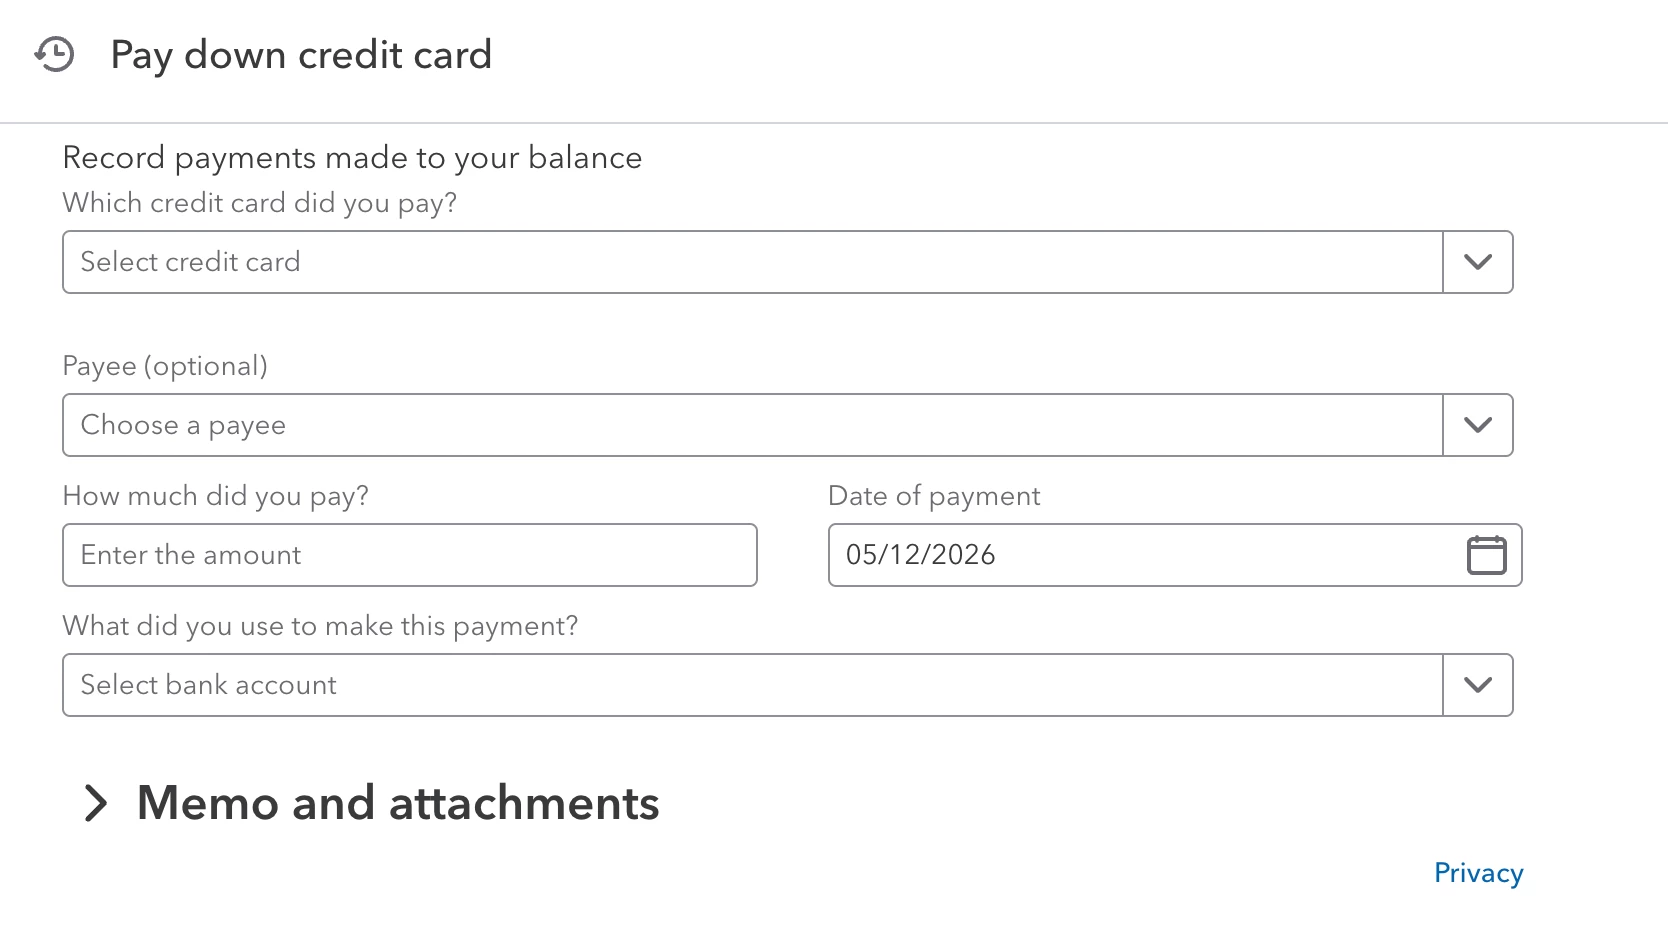
In QuickBooks Online, navigate to + Create, then Pay down a credit card.
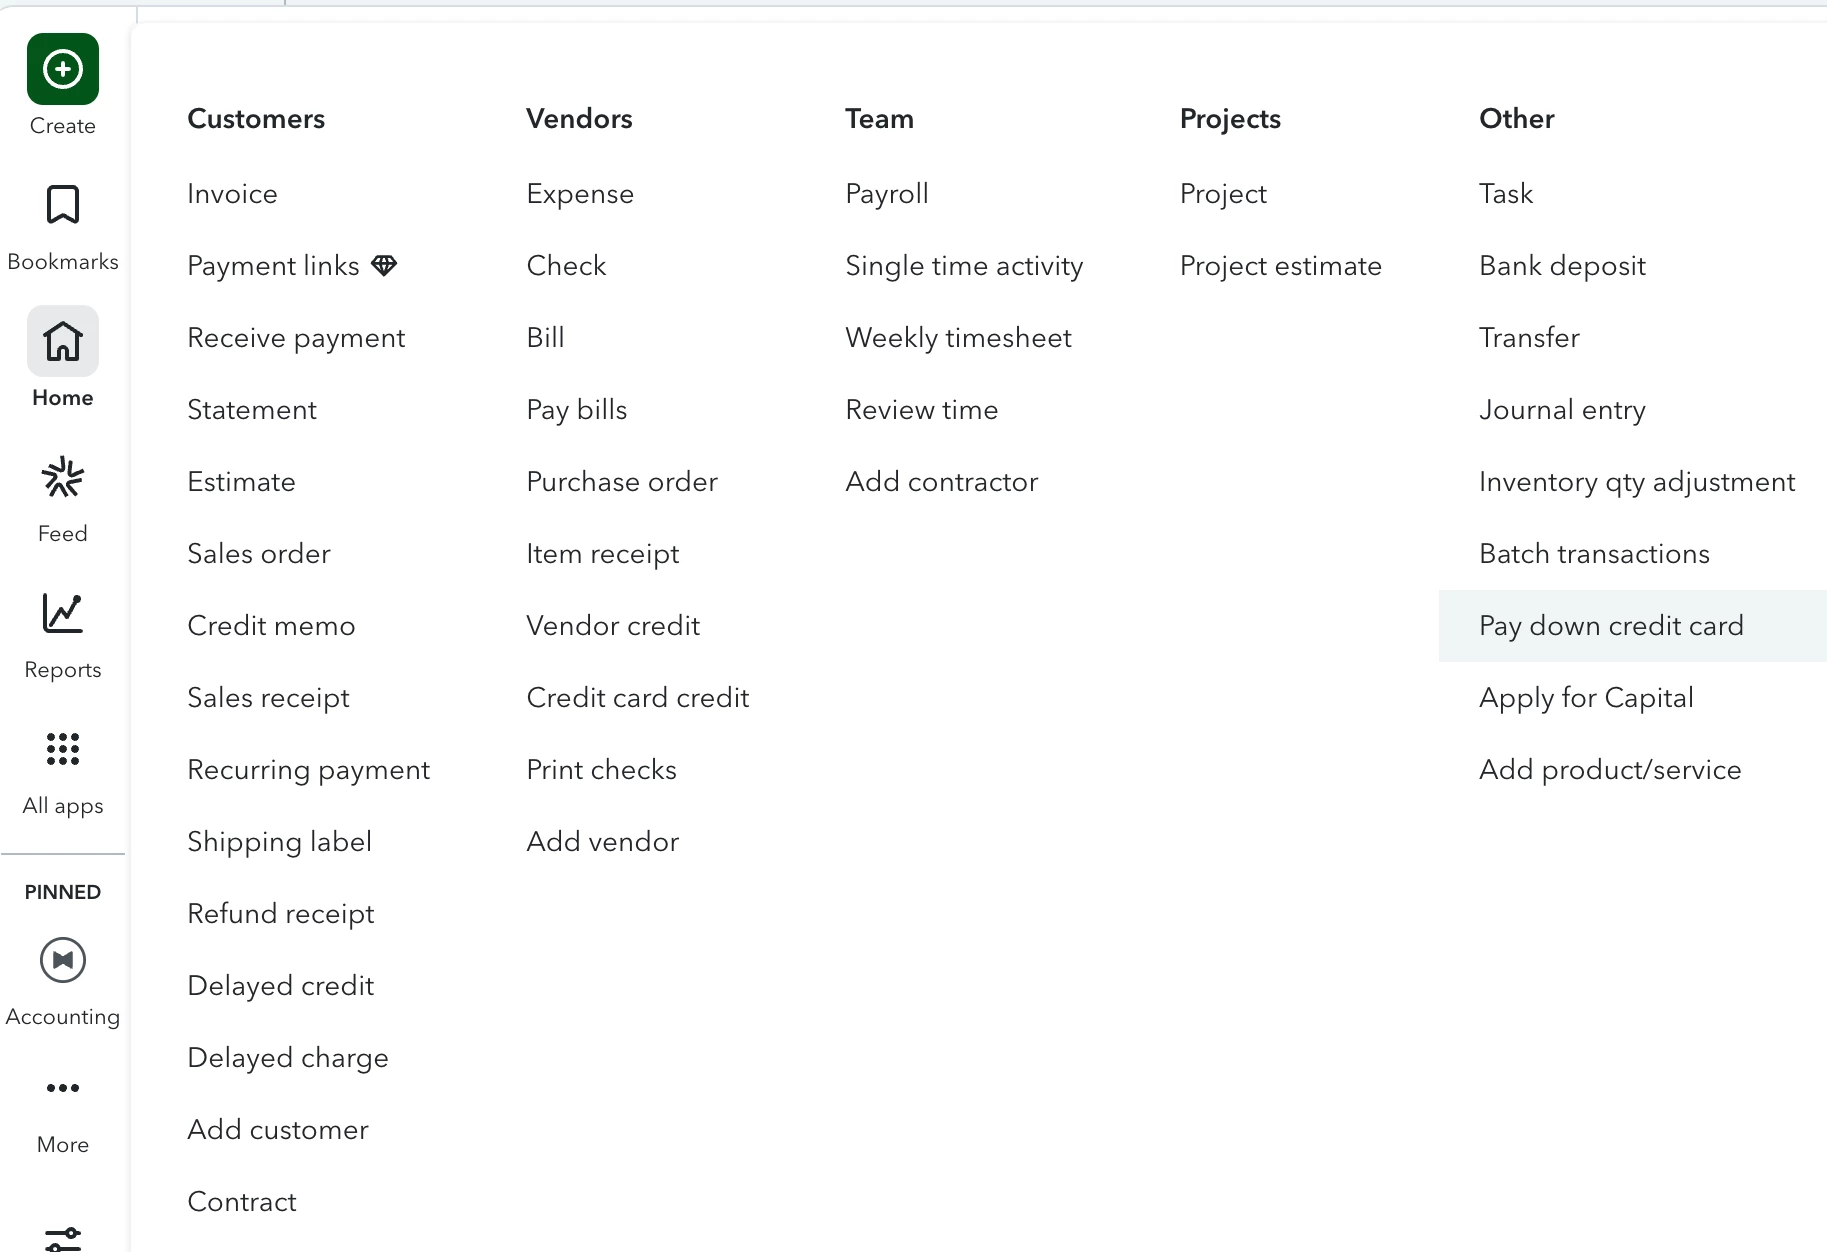
Select the credit card account you're paying, enter the payment amount and date, and then choose the bank account the funds are coming from. Save the transaction, and QuickBooks will record it properly, thus reducing your credit card liability without double-counting it as an expense.
If you paid your bill through your connected bank feed, you may also see the transaction come in automatically. In that case, categorize it to your credit card liability account (not an expense account) to keep everything balanced.
See the full steps for recording credit card payments
3. How do I view past journal entries to check them?
Reviewing your journal entries is a smart habit, as it helps catch errors before they snowball. In QuickBooks Online, the easiest way to pull up a list is through your Chart of Accounts or the Reports section.
To see a full list of journal entries:
- Go to Reports.
- Search for and run the Journal report (also called the Transaction Journal).
- Set your desired date range and review the entries line by line.
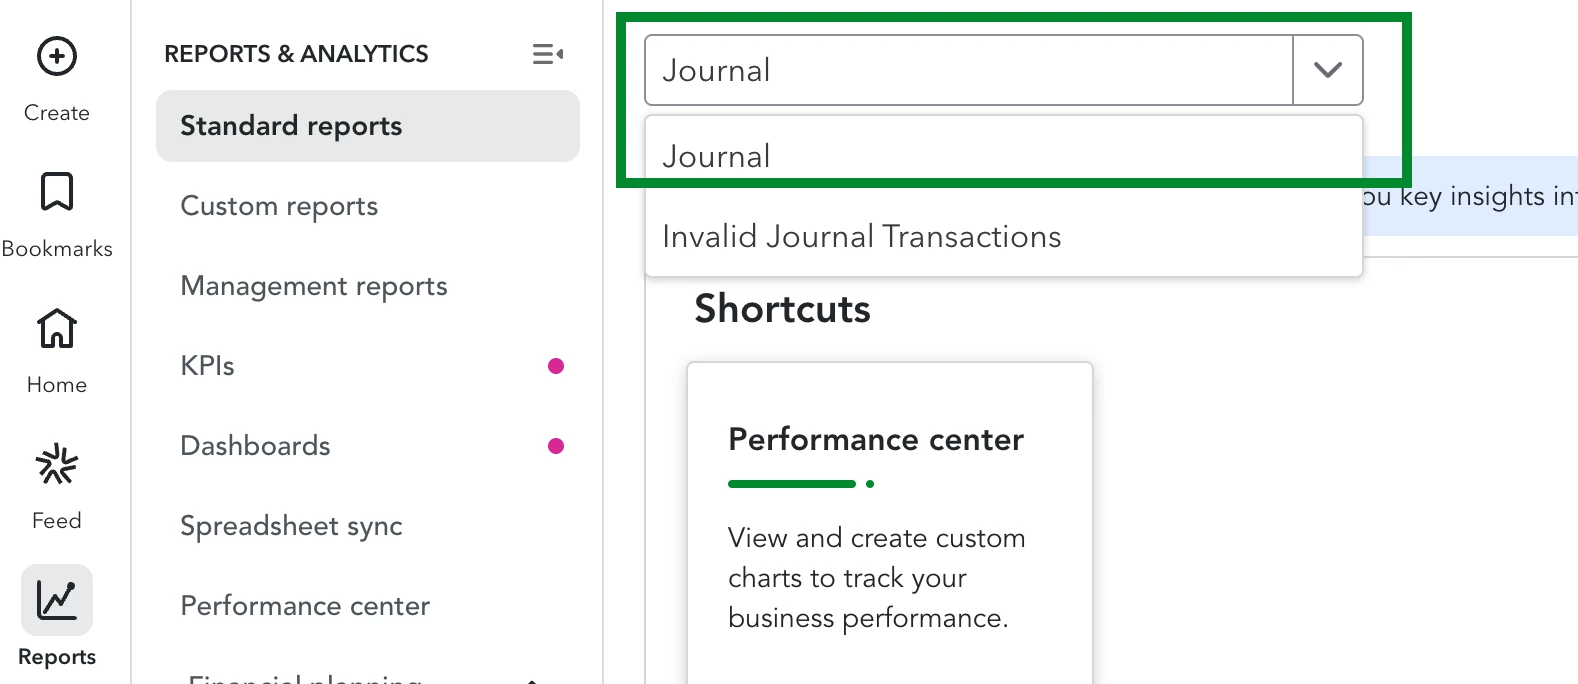
You can also locate individual journal entries by going to Settings ⚙ then Chart of Accounts, selecting the relevant account, and clicking View register. From there, filter by transaction type to isolate journal entries.
If you need to edit or investigate a specific entry, clicking on it will open the full details, including which accounts were debited and credited.
Learn how to view a list of all journal entry line items
4. How do I apply a vendor credit to the amount owed to a vendor?
If a vendor has issued you a credit, QuickBooks makes it straightforward to apply that credit against an open bill so you're not overpaying.
Start by recording the vendor credit:
- Go to + Create then Vendor Credit.
- Select the vendor, enter the credit amount and the relevant account or item, then save.
- Next, apply it when you pay the bill:
- Go to + Create then Pay Bills.
- Find the vendor and the bill you want to pay.
- If a credit is available, an open box will show under the Credit Applied column.
- Click into the credit box and add the applicable amount.
- QuickBooks will show your available credit balance underneath the box once it is clicked.
- The amount due will adjust accordingly. Pay the remaining balance as usual.
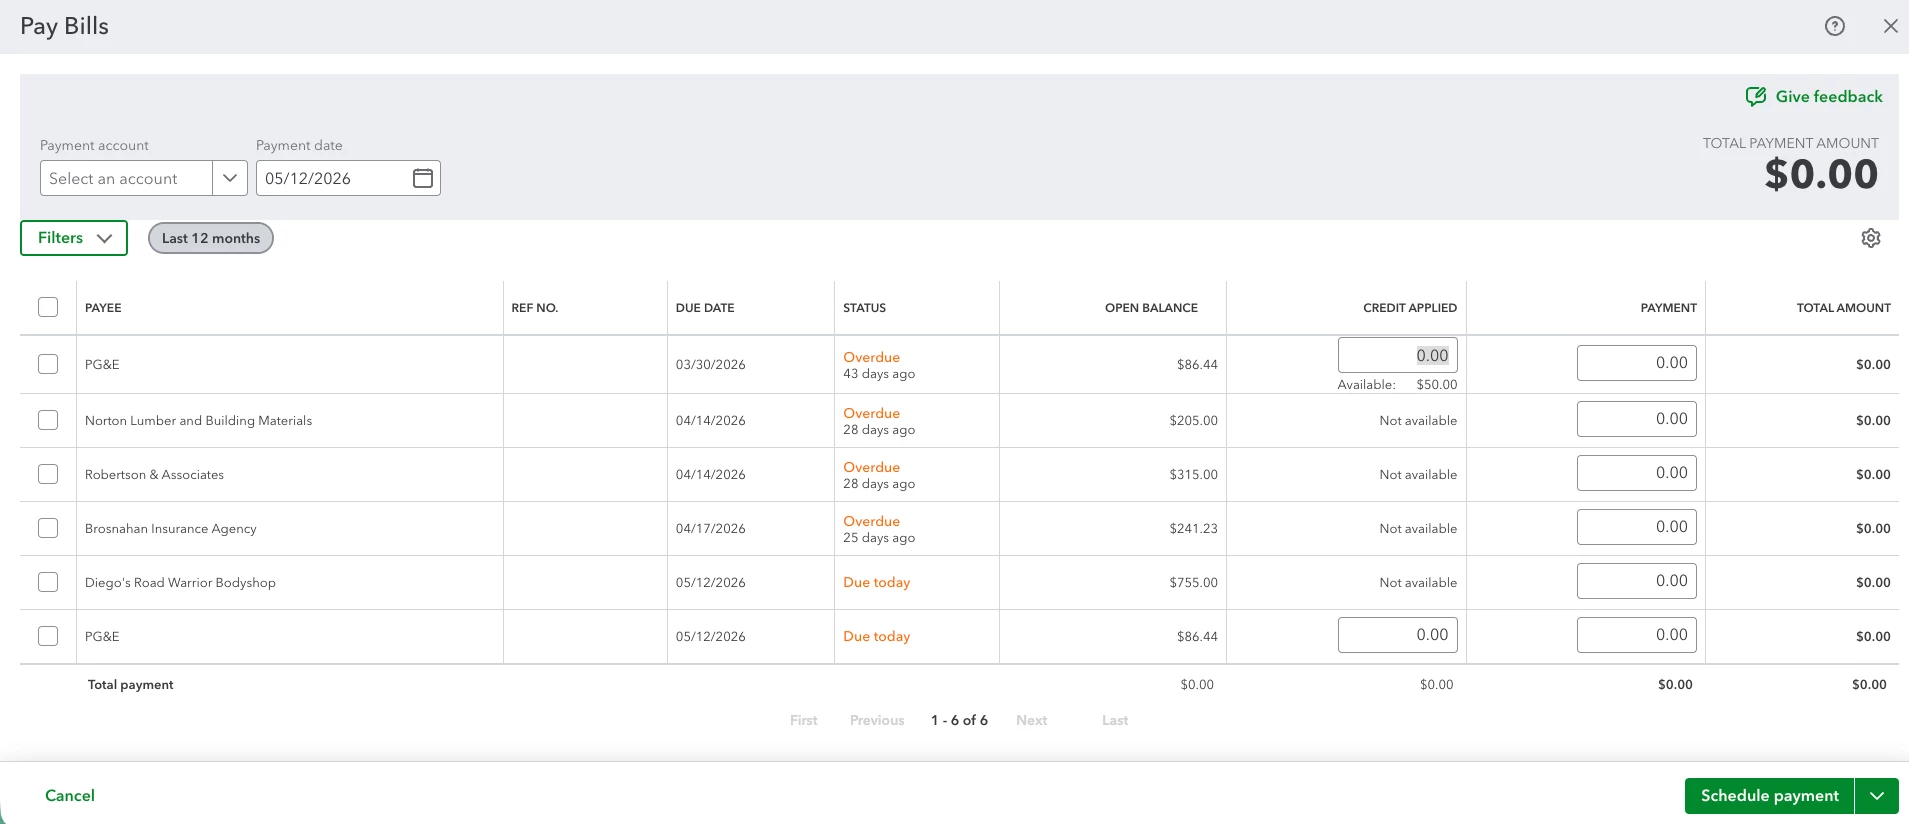
This ensures the credit reduces what you actually owe rather than sitting unused in your vendor account.
Full walkthrough: create and apply vendor credits in QuickBooks Online
5. If an invoice has been paid, how do I send a receipt to the customer to show that it was paid?
Once you've recorded a payment against an invoice in QuickBooks Online, you can send the customer a payment receipt directly from that transaction.
Here's how:
- Go to Sales & Get Paid then Sales Transactions and find the payment you received.
- Click the arrow in the Action column.
- Select Send, make any messaging edits needed, then click Send again.
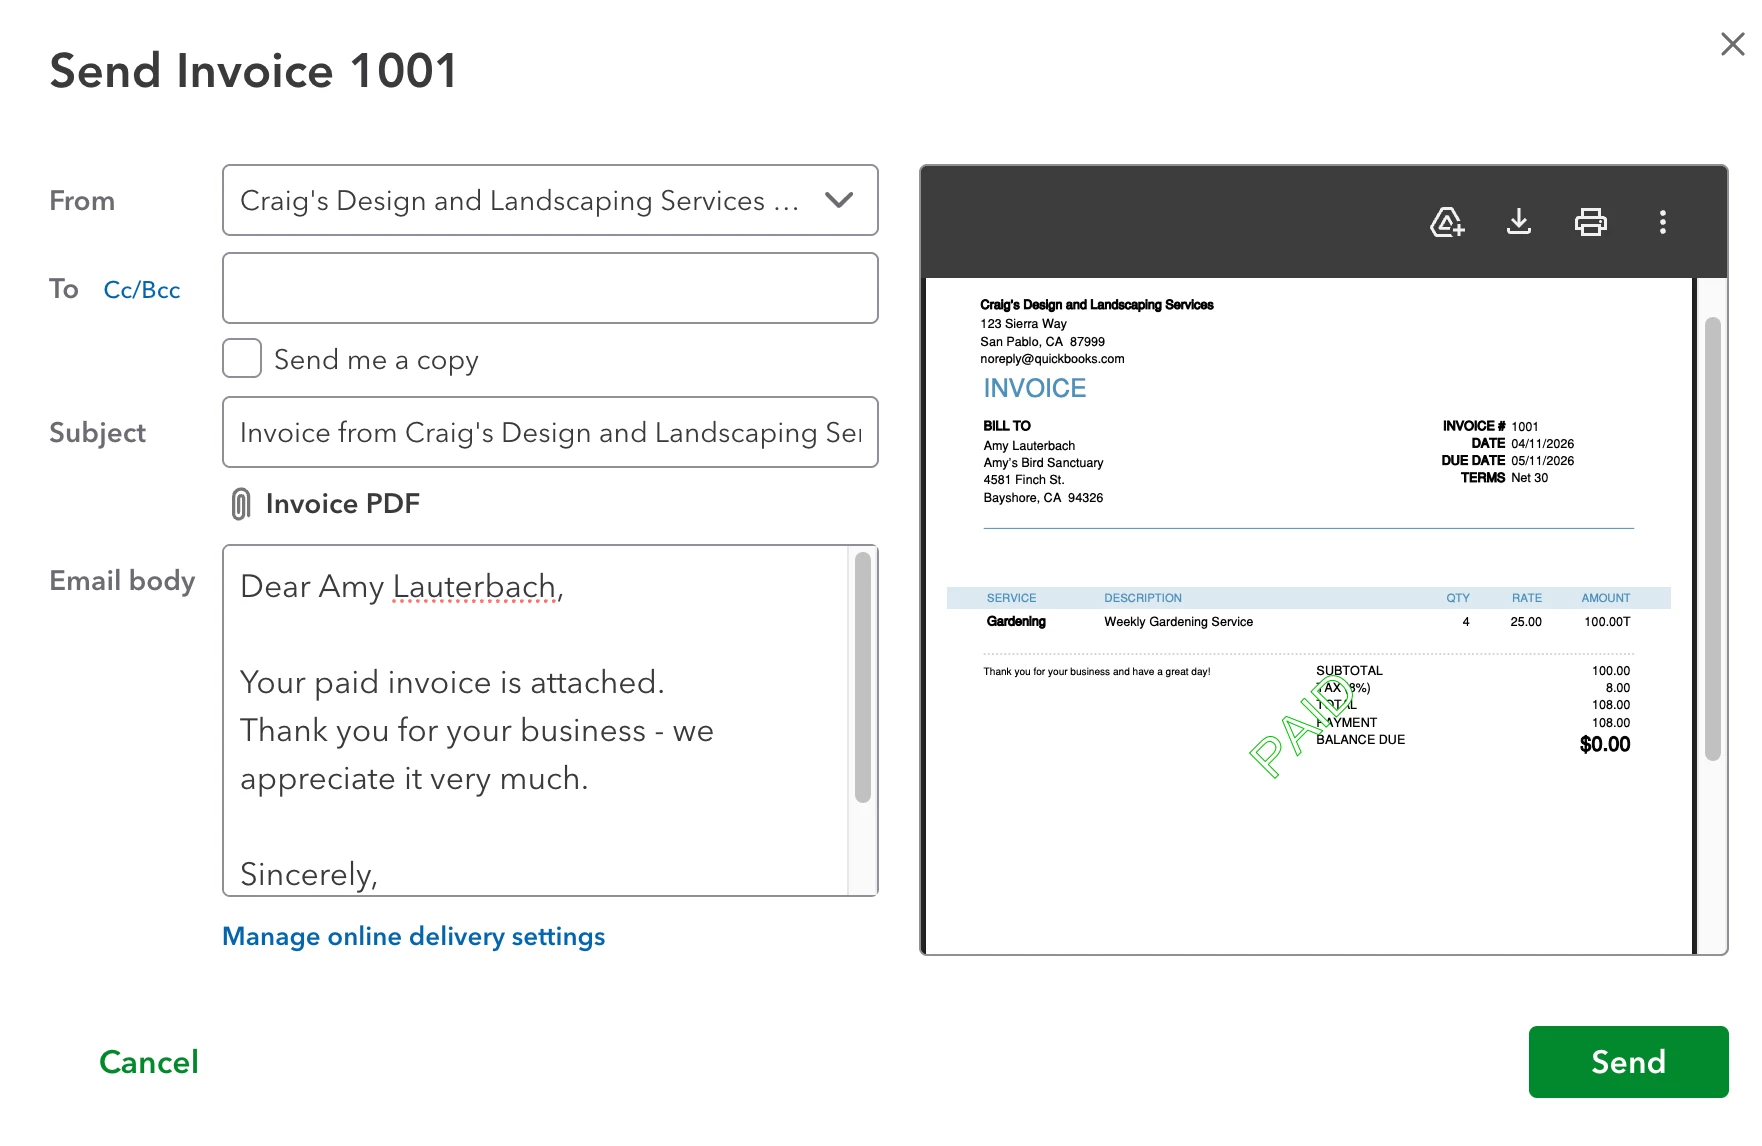
The receipt will show the invoice number, the amount paid, the payment date, and the remaining balance (if any). It's a clean, professional confirmation your customer can keep for their records.
Step-by-step: receive a payment and send a receipt in QuickBooks Online