SUMMER SAVINGS 90% OFF QuickBooks for 3 months* Ends 8/27

Buy now
Switch to QuickBooks and 70% off for 3 Months
August 26, 2025
Solved

How do I fix receipts that won't attach to transactions in QuickBooks Desktop Receipt Management?

  • August 26, 2025
  • 4 replies
  • 142 views

QuickBooks Premiere Plus 2024 Edition:

I'm having a problem with the Receipt Management feature not attaching the receipts (.jpg images) to the expense once I've "reviewed" the expense, added in all the receipt details, and clicked "Save & Add to Register".  The expense does add correctly in the vendor account, but when I click on the transaction, there is no attachment. 

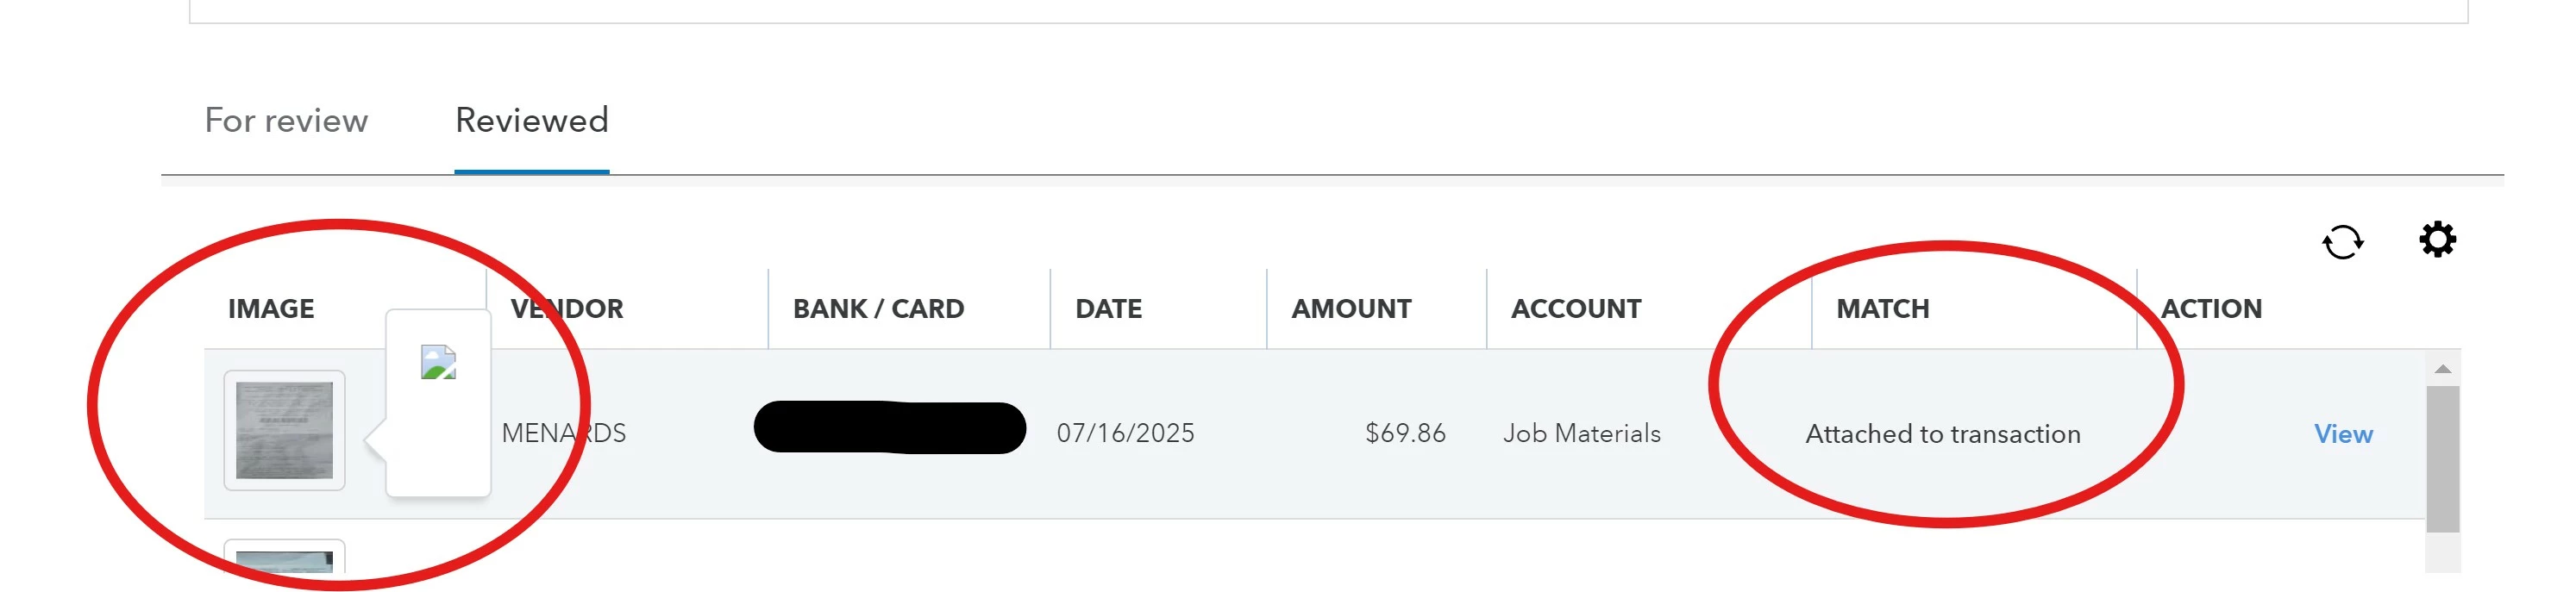
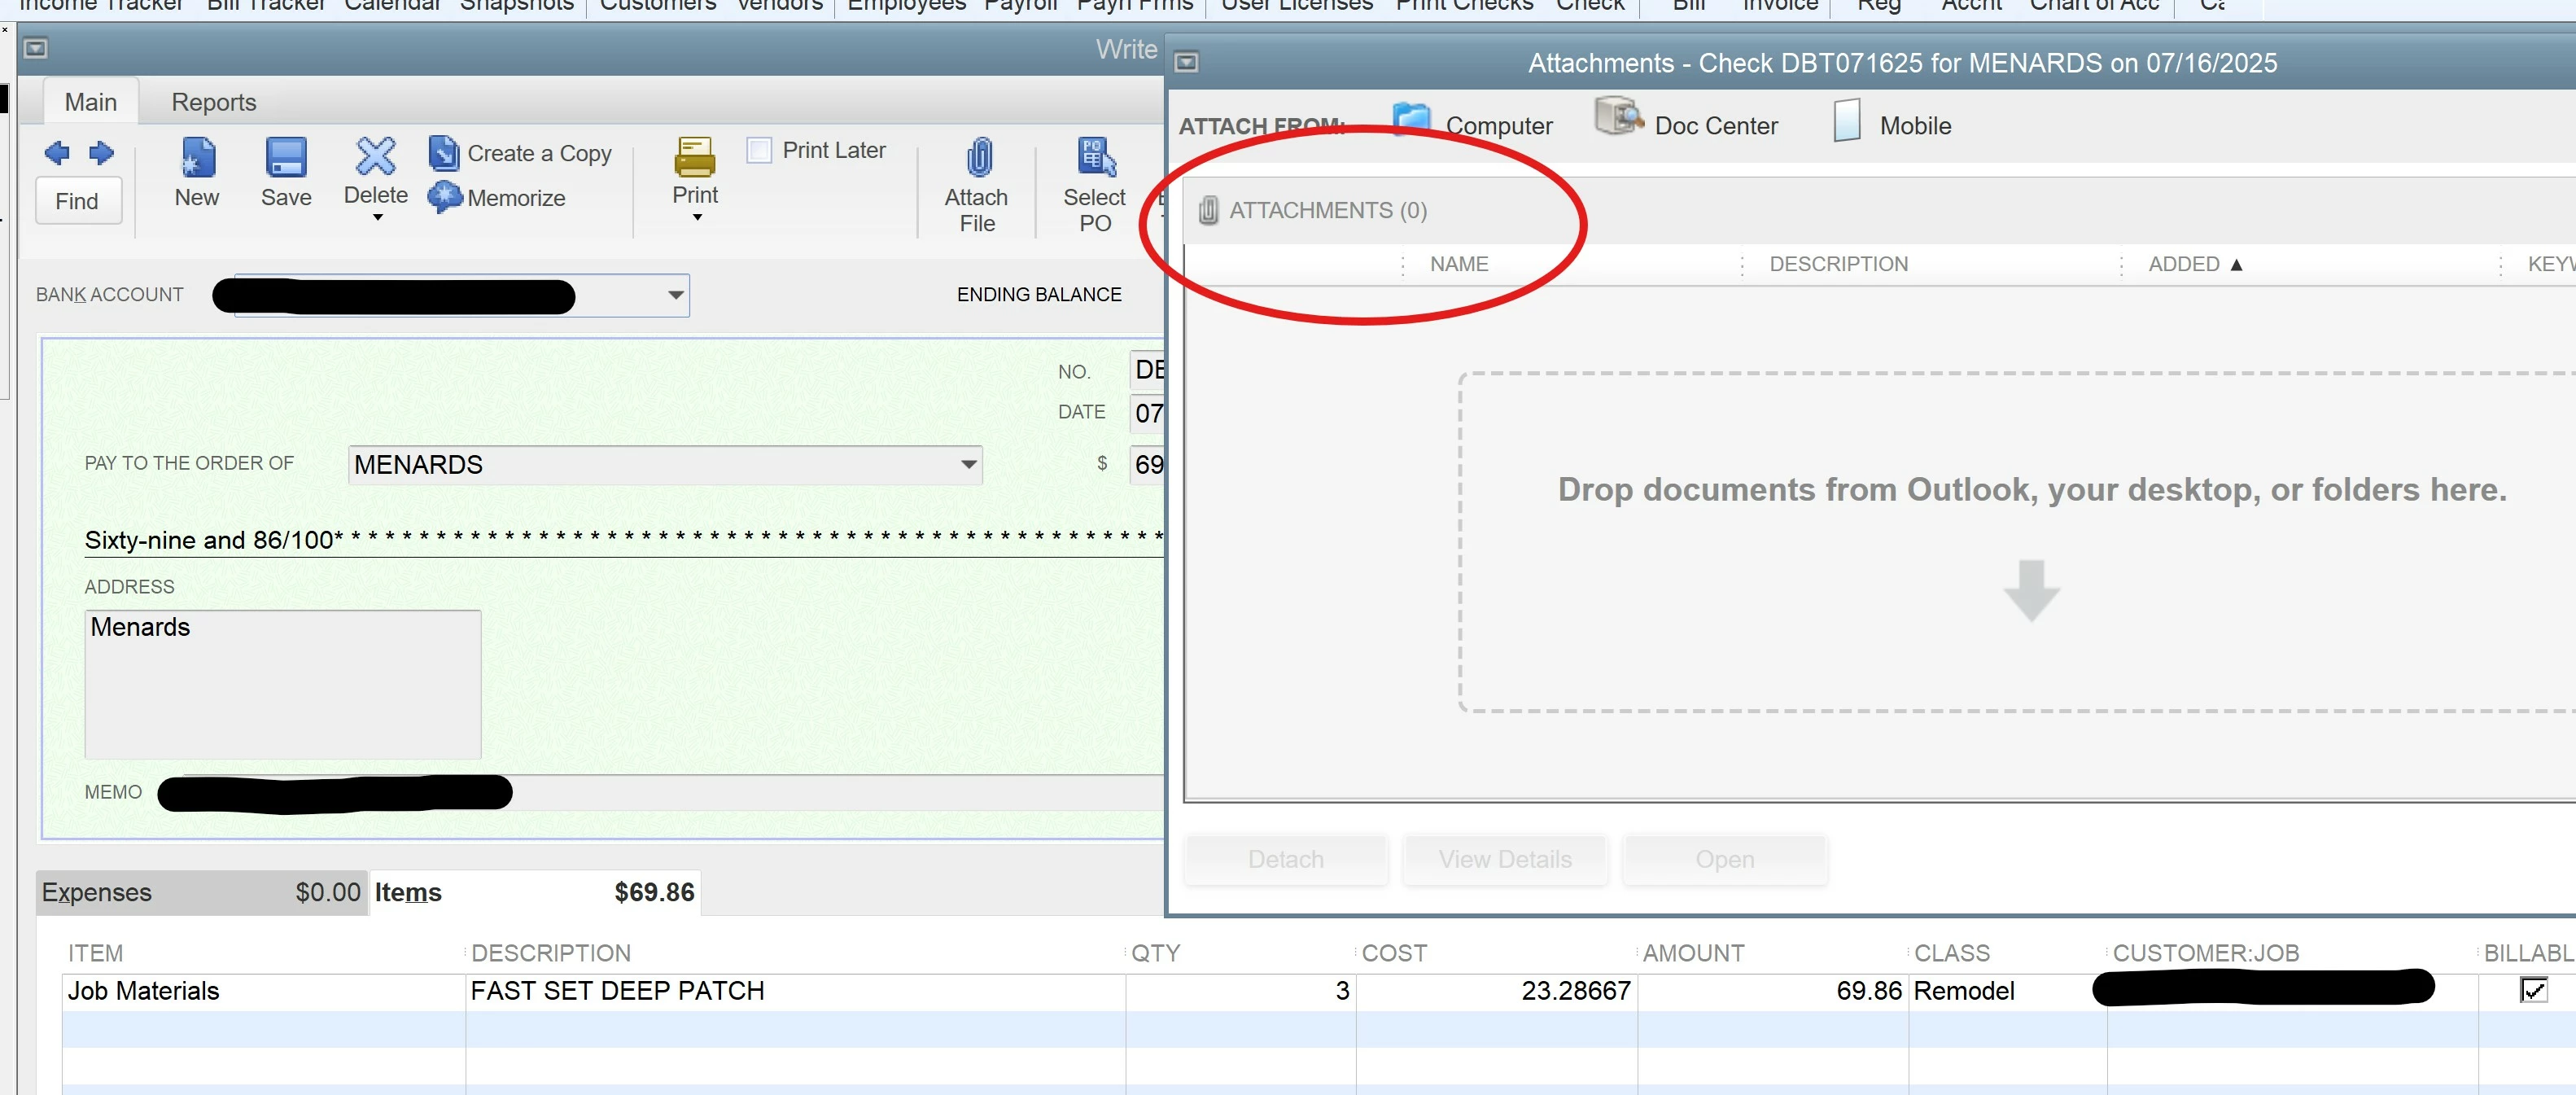
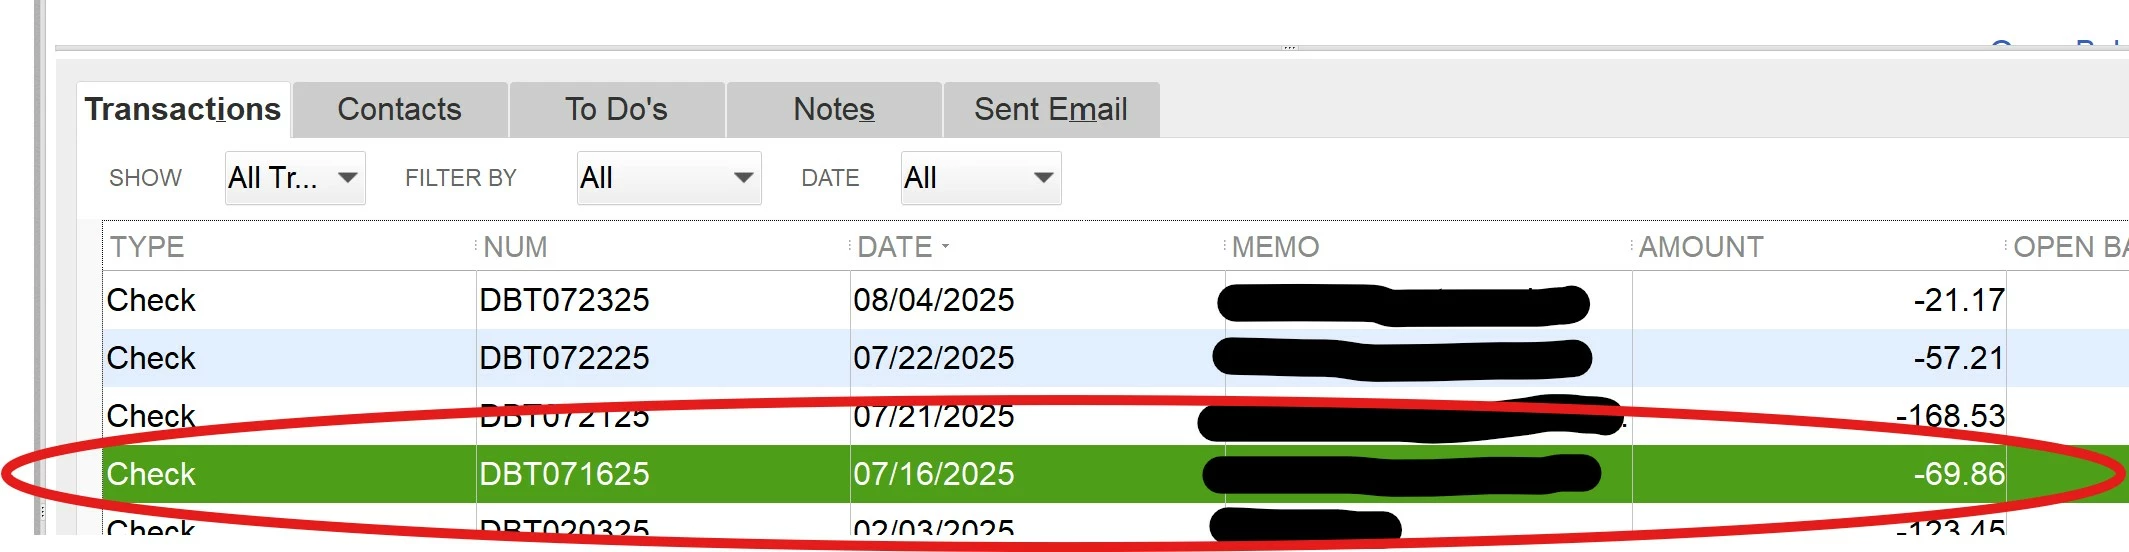
Furthermore, under receipt management, when I go to the "Reviewed" tab, I can see a thumbnail of the added receipt, and the all the detailed information - including, under the column "Match", where is says "Attached to transaction".  If I click on the thumbnail (which I can tell does look like the receipt image), it shows a broken link image, so there's nothing for me to view.  Under the "Action" column, I can click on "View" - this takes me to the appropriate expense information (with the top heading "Write Checks") and I can also see the "Check" under the correct vendor transactions.  When viewing the Check, there are no attachments.


I've been doing a workaround by doing a screenshot of the receipt when I initially put it in, saving it to a "receipts" folder, then, after saving it in the register, going back into the vendor and that "check" and manually attaching it there.  This is so tedious!


I've done the data rebuild several times and this not help.  Is there maybe a setup thing I'm missing where these images aren't being stored in the correct location, or simply something I've missed?  Any suggestions would be great, as my workaround solution just creates so much extra work to input!


I've put some screenshots on so you can see what I see
Best answer by cody_a

If your uploaded receipts show up in Receipt Management but never actually attach to the transaction after you save it, the fix is almost always the same: use the Attach button during the review step instead of going straight from review to Save and add to register. This applies to QuickBooks Desktop Plus, Accountant, and Enterprise, including Premier Plus. Skipping that button is what leaves you with a broken thumbnail and a transaction with nothing attached, so you don't need to keep screenshotting receipts and attaching them by hand afterward.

Step 1: Confirm receipt access and permissions

Before anything else, make sure everyone involved is set up correctly:

  • Anyone capturing receipts from a phone should be signed into the correct Intuit Account in the QuickBooks Desktop mobile app.
  • On the desktop side, confirm each user has permissions for Banking, Vendors, Registers, and Transactions so receipts can match up with the right transaction.

You can manage who has receipt access from inside QuickBooks:

  1. Go to Vendor, then select Receipt Management.
  2. Select Manage users.
  3. Choose either Give Desktop and Mobile access or Give only mobile access, then select Continue.
  4. Select Add user, enter the user's email address, keep the role as Basic user, and select Save.

Once the user accepts the invite, they'll be able to manage receipts.


Step 2: Use Attach, not just Save and add to register

This is the step that usually solves the attachment issue. Here's the full review flow:

  1. Go to Vendor, then select Receipt Management.
  2. From the For Review tab, select the Refresh icon so your latest receipts show up.
  3. From the receipt, select the small arrow, then select Review.
  4. If the receipt matches the transaction, select Attach. If the match is wrong, select Remove match and create a new transaction instead.
  5. Select OK.

Attaching this way links the receipt image directly to the transaction record, so it shows up when you open that check or expense later, instead of leaving you with a broken thumbnail and a transaction with nothing attached.


Step 3: Upload receipts the supported way

QuickBooks Desktop Plus, Accountant, and Enterprise all support a few ways to get receipts into Receipt Management:

  • Drag and drop or browse to upload directly from QuickBooks Desktop.
  • Capture and upload from the QuickBooks Desktop iOS or Android mobile app.
  • Email images or PDFs to your custom @qbdesktopdocs.com address.
  • Upload directly from Google Drive.

Whichever method you use, each file should contain only one receipt, and accepted formats are PDF, JPEG, JPG, GIF, or PNG.

Learn more: Upload receipts to QuickBooks Desktop Plus, Accountant, or Enterprise


Still running into it after trying the Attach step above? Drop a reply below and let us know which upload method you're using and what you're seeing.

4 replies

whitAuthor
August 26, 2025

FYI - These receipts come in to Receipt Management from my employees uploading them through the Android App

Tori B
QuickBooks Team
August 26, 2025

Thanks for taking the time to reach out to the QuickBooks Community, @whit.


How are you doing today? I hope all is well. 


There are a couple of things we can cover here to ensure you're set up correctly. First, I wanted to clarify your user permissions. To do that, let's check the following: 


  • Make sure the employees are signed into the correct Intuit account in the QuickBooks Android app.
  • On the desktop, confirm that your QuickBooks users have permissions for Banking, Vendors, Registers, and Transactions so receipts can be properly matched to transactions.


For additional information about this process, check out Upload receipts to QuickBooks Desktop.


Once the user permissions are confirmed, and if you're still experiencing issues, let's ensure receipt file names do not contain special characters (like !, @, #). This can cause the images to link incorrectly. 


I also wanted to mention that oftentimes, users who add images by using the Matched feature can have broken thumbnail links (images). With that said, let's try adding them by clicking on the Review tab, then tapping on Attach. From there, select Save and Add to register


If you're still facing issues, I recommend contacting our Technical Support Team. Our agents have the tools to screen share securely so they can investigate this matter further. You can use the link I'm including below to connect with our team directly. 


Please don't hesitate to let me know if you have any additional questions or concerns. Have a good one! 

whitAuthor
August 26, 2025

Thank you for the quick response!

Just to clarify, my employee only captures the receipts from his phone.  I am the one logged in on the desktop, as an admin, and I am the one that does the receipt management.  The other user that is set up is setup as a "secondary admin", so I don't think there's any issues there.


Under the "For Review" tab, I have a column titled "Action", where I select "Review".  From that review, I can click on "Save and Add to Register".  I do not have an "Attach" option, either under "Actions" or by clicking on the receipt picture.  When I do click on the "Review" tab, I can see the receipt image just fine and make whatever adjustments I need before clicking on "Save and Add to Register".


As for the image file names, the app auto suggests a name, but only has a "-" as part of the name (which should be acceptable) and no other special characters.


This feature has never worked for me.  I've called several times throughout the years and have only been walked through rebuilding the data files and uninstalling/reinstalling the program.  There has not been anyone able to help me so far.  I'm just to the point where I'm tired of the extra work I'm doing!

cody_a
cody_aCommunity ManagerAnswer
Community Manager
August 26, 2026

If your uploaded receipts show up in Receipt Management but never actually attach to the transaction after you save it, the fix is almost always the same: use the Attach button during the review step instead of going straight from review to Save and add to register. This applies to QuickBooks Desktop Plus, Accountant, and Enterprise, including Premier Plus. Skipping that button is what leaves you with a broken thumbnail and a transaction with nothing attached, so you don't need to keep screenshotting receipts and attaching them by hand afterward.

Step 1: Confirm receipt access and permissions

Before anything else, make sure everyone involved is set up correctly:

  • Anyone capturing receipts from a phone should be signed into the correct Intuit Account in the QuickBooks Desktop mobile app.
  • On the desktop side, confirm each user has permissions for Banking, Vendors, Registers, and Transactions so receipts can match up with the right transaction.

You can manage who has receipt access from inside QuickBooks:

  1. Go to Vendor, then select Receipt Management.
  2. Select Manage users.
  3. Choose either Give Desktop and Mobile access or Give only mobile access, then select Continue.
  4. Select Add user, enter the user's email address, keep the role as Basic user, and select Save.

Once the user accepts the invite, they'll be able to manage receipts.


Step 2: Use Attach, not just Save and add to register

This is the step that usually solves the attachment issue. Here's the full review flow:

  1. Go to Vendor, then select Receipt Management.
  2. From the For Review tab, select the Refresh icon so your latest receipts show up.
  3. From the receipt, select the small arrow, then select Review.
  4. If the receipt matches the transaction, select Attach. If the match is wrong, select Remove match and create a new transaction instead.
  5. Select OK.

Attaching this way links the receipt image directly to the transaction record, so it shows up when you open that check or expense later, instead of leaving you with a broken thumbnail and a transaction with nothing attached.


Step 3: Upload receipts the supported way

QuickBooks Desktop Plus, Accountant, and Enterprise all support a few ways to get receipts into Receipt Management:

  • Drag and drop or browse to upload directly from QuickBooks Desktop.
  • Capture and upload from the QuickBooks Desktop iOS or Android mobile app.
  • Email images or PDFs to your custom @qbdesktopdocs.com address.
  • Upload directly from Google Drive.

Whichever method you use, each file should contain only one receipt, and accepted formats are PDF, JPEG, JPG, GIF, or PNG.

Learn more: Upload receipts to QuickBooks Desktop Plus, Accountant, or Enterprise


Still running into it after trying the Attach step above? Drop a reply below and let us know which upload method you're using and what you're seeing.