
Get 50% OFF QuickBooks for 3 months*

Buy now
Switch to QuickBooks and 70% off for 3 Months
February 12, 2026
Question

Quickbooks Enterprise Invoice Email Footer - wrong and looks shady

  • February 12, 2026
  • 1 reply
  • 4 views

Hello,

Does anyone know how to remove the email footer that comes automatically when we email an invoice, or at least change it a little?

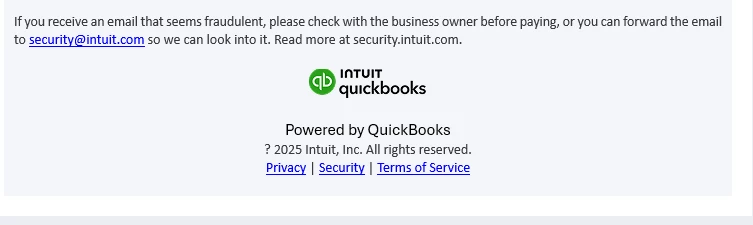
The email footer says very grandly - "if you suspect this email or invoice to be fraudulent contact .." and then puts in (picture attached) "?2025, Intuit, Inc. "

First - the date is wrong

Second the ? in front of 2025 makes me think it is from a scammer who was rushing a bit.

Third - if you mouse hove over the links provided, they are incredibly long urls that would make anyone worry.


I talked to Quickbooks Enterprise Support and they said Quickbooks had no interest in fixing this - which seems strange - if they want their brand to be seen in a good light. They also said that we could not remove the footer and so we will have to live with a footer that looks like it came from a scammer, or print to pdf and do 5 more steps to get our invoices out.


Very strange that quickbooks does not care.


Here is the picture.


I am not sure which sub forum to post to. If you think I should post to a different sub forum please let me know.

Any help appreciated.

Thanks


Sam
 

1 reply

Linkasink
March 11, 2026

That is strange. My QBs has the copy right symbol ( the lower case "c" within a circle) not a question mark. What version of QuickBooks are you using? It could be that the 2025 is representing the copy right license for your version of quickBooks. To edit the template in the desktop version follow these steps.

Steps to Change Default Email Templates (QBDT):
  1. Access Preferences: Go to the Edit menu and select Preferences.
  2. Navigate to Send Forms: Choose Send Forms in the left panel and click the Company Preferences tab.
  3. Edit or Add Template:
    • Highlight the transaction type (e.g., Invoice, Estimate) and click Edit.
    • Alternatively, click Add Template to create a new custom template.
  4. Modify Template: Update the template name, subject, and body of the email. You can use < > fields to automatically insert customer or company data.
  5. Save Changes: Click Save and then OK. 


Important Notes:
  • You must be in single-user mode to make these changes.
  • To set a new template as the default, ensure it is selected for that transaction type under Company Preferences.
  • If the default doesn't update, try unchecking the "Email Later" box on the invoice, saving, and then re-checking it