


What’s new? A more organised way to manage your Invoices
We’re continuing to evolve the Invoicing experience to make it more intuitive, cleaner, and more organised for you to manage your business. We’ve made some improvements to simplify your invoicing and give you more control.
Managing exchange rates on foreign currency invoices:
If you create invoices for customers who use a different currency than your home currency, you’ll notice a small but important change in where exchange rates are managed.
What’s changed?
When you selected a customer who uses a different currency (for example, a customer invoiced in Euros while your home currency is GBP), the currency exchange appeared automatically beneath the customer name.
Exchange rates are still easy to manage, they’re just now located in a more structured place.
After selecting your customer:
- Click Manage.
- Go to Payment options.
- You’ll see the Exchange rate field.
- Click Edit to view or update the rate (for example, GBP to Euro).
When editing the exchange rate, you now have more control over how changes are applied:
- Transaction only: applies the rate to just this invoice.
All transactions in this currency today – apply the updated rate to any new invoices created today in that currency.
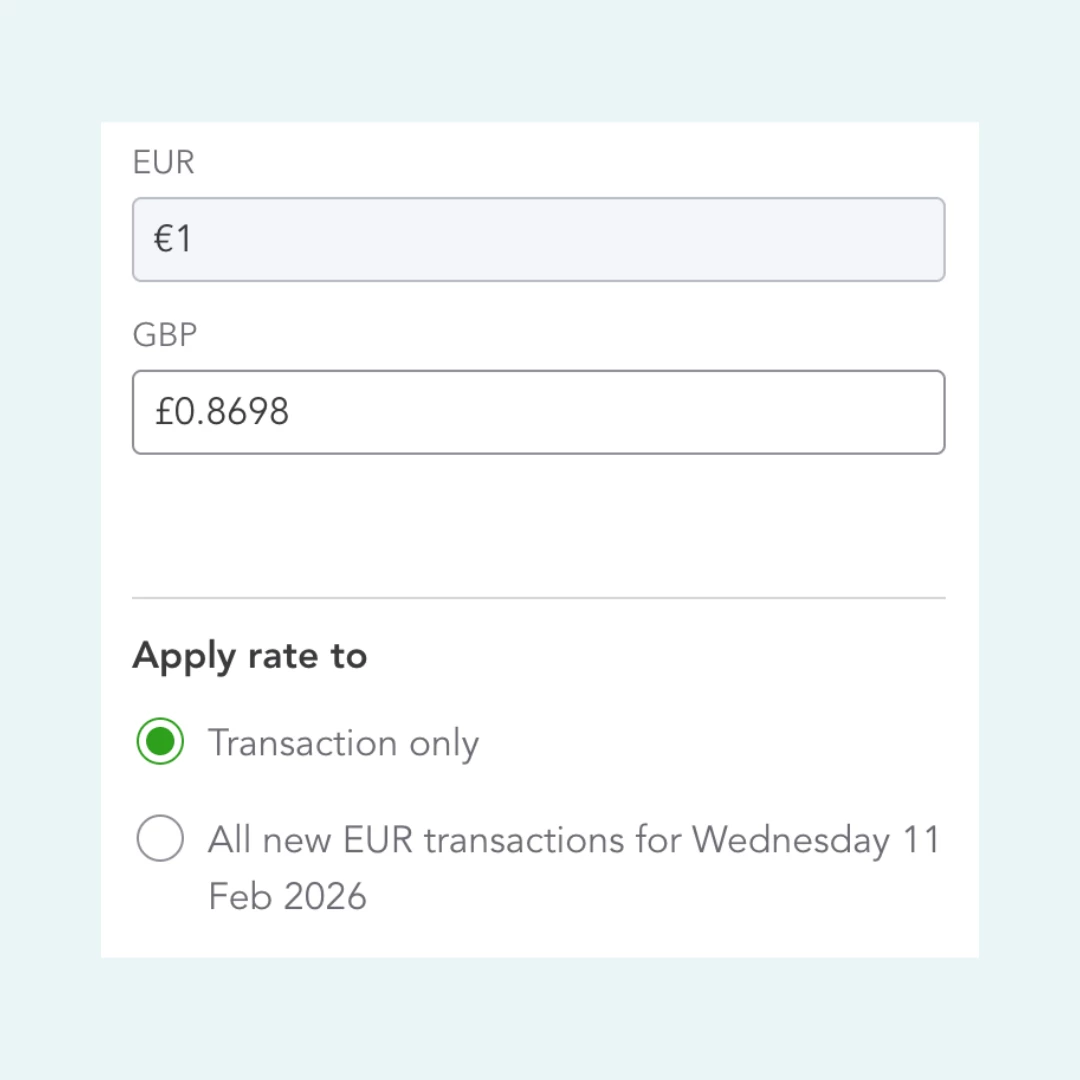
What this means for you: The invoice screen stays cleaner while still giving you full control. You can quickly decide whether a rate change applies to just one invoice or multiple transactions, helping you stay on top of receiving foreign currencies.
Send Later and Print Later Options
We’ve also made a small but helpful change to how you schedule invoices to send or print later.
What’s changed?
In the previous invoicing experience: Send Later and Print Later appeared as checkboxes. However, now you can:
- Click Manage on the invoice.
- In the panel that opens, you’ll find Send later and Print later options under Scheduling.
- These are now displayed as toggle switches instead of checkboxes.
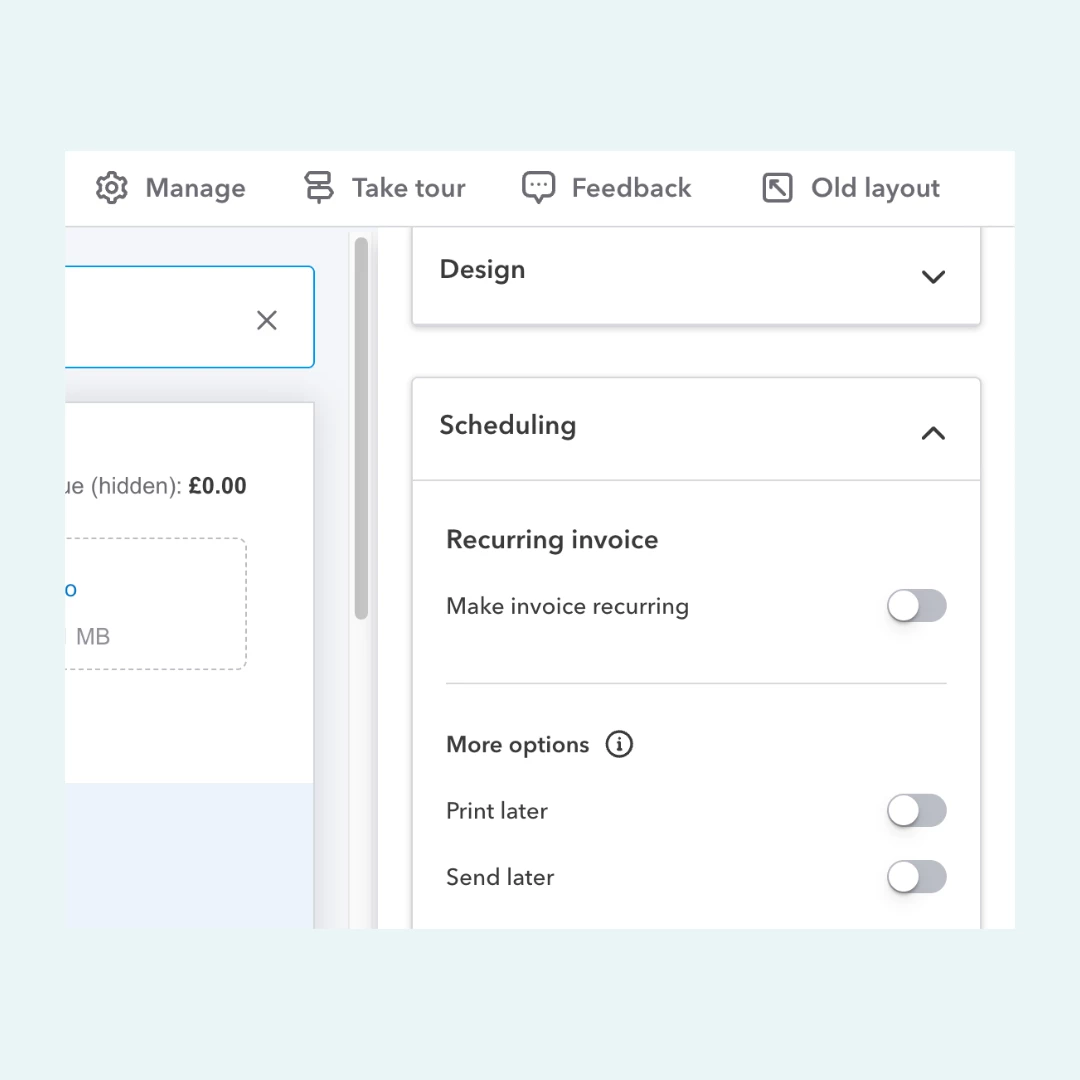
What this means for you: This small change makes it easier to review how and when an invoice will be sent before finalising it, without cluttering your workspace.
View your invoice status
We’ve also made it easier to check the status of your invoices. Allowing you to see a clear timeline of your invoice activity and track customer engagement without having to leave the invoice. To check the status of an invoice:
- Click into the invoice.
- Click Manage.
- In the panel that opens, select Status.
- Here you can find information about when the invoice was sent, viewed, paid, or deposited.
What this means for you: You can quickly see whether an invoice has been viewed, paid, or deposited, making follow-ups easier than ever.
- Access invoice templates and customised templates
If you use customised invoice templates, you’ll notice that this option has moved. The template options have moved from the bottom of the invoice screen to a right-side panel that opens when you click Manage.
What’s changed?
To access your templates:
- Open your invoice.
- Click Manage.
- Select Design.
You’ll see your available templates here. The default template design is Modern.
If you’d like to edit your current design:
- Select the option to add/edit designs.
- This will take you to Custom form styles, where you can modify existing templates, create new styles, and set your default design.
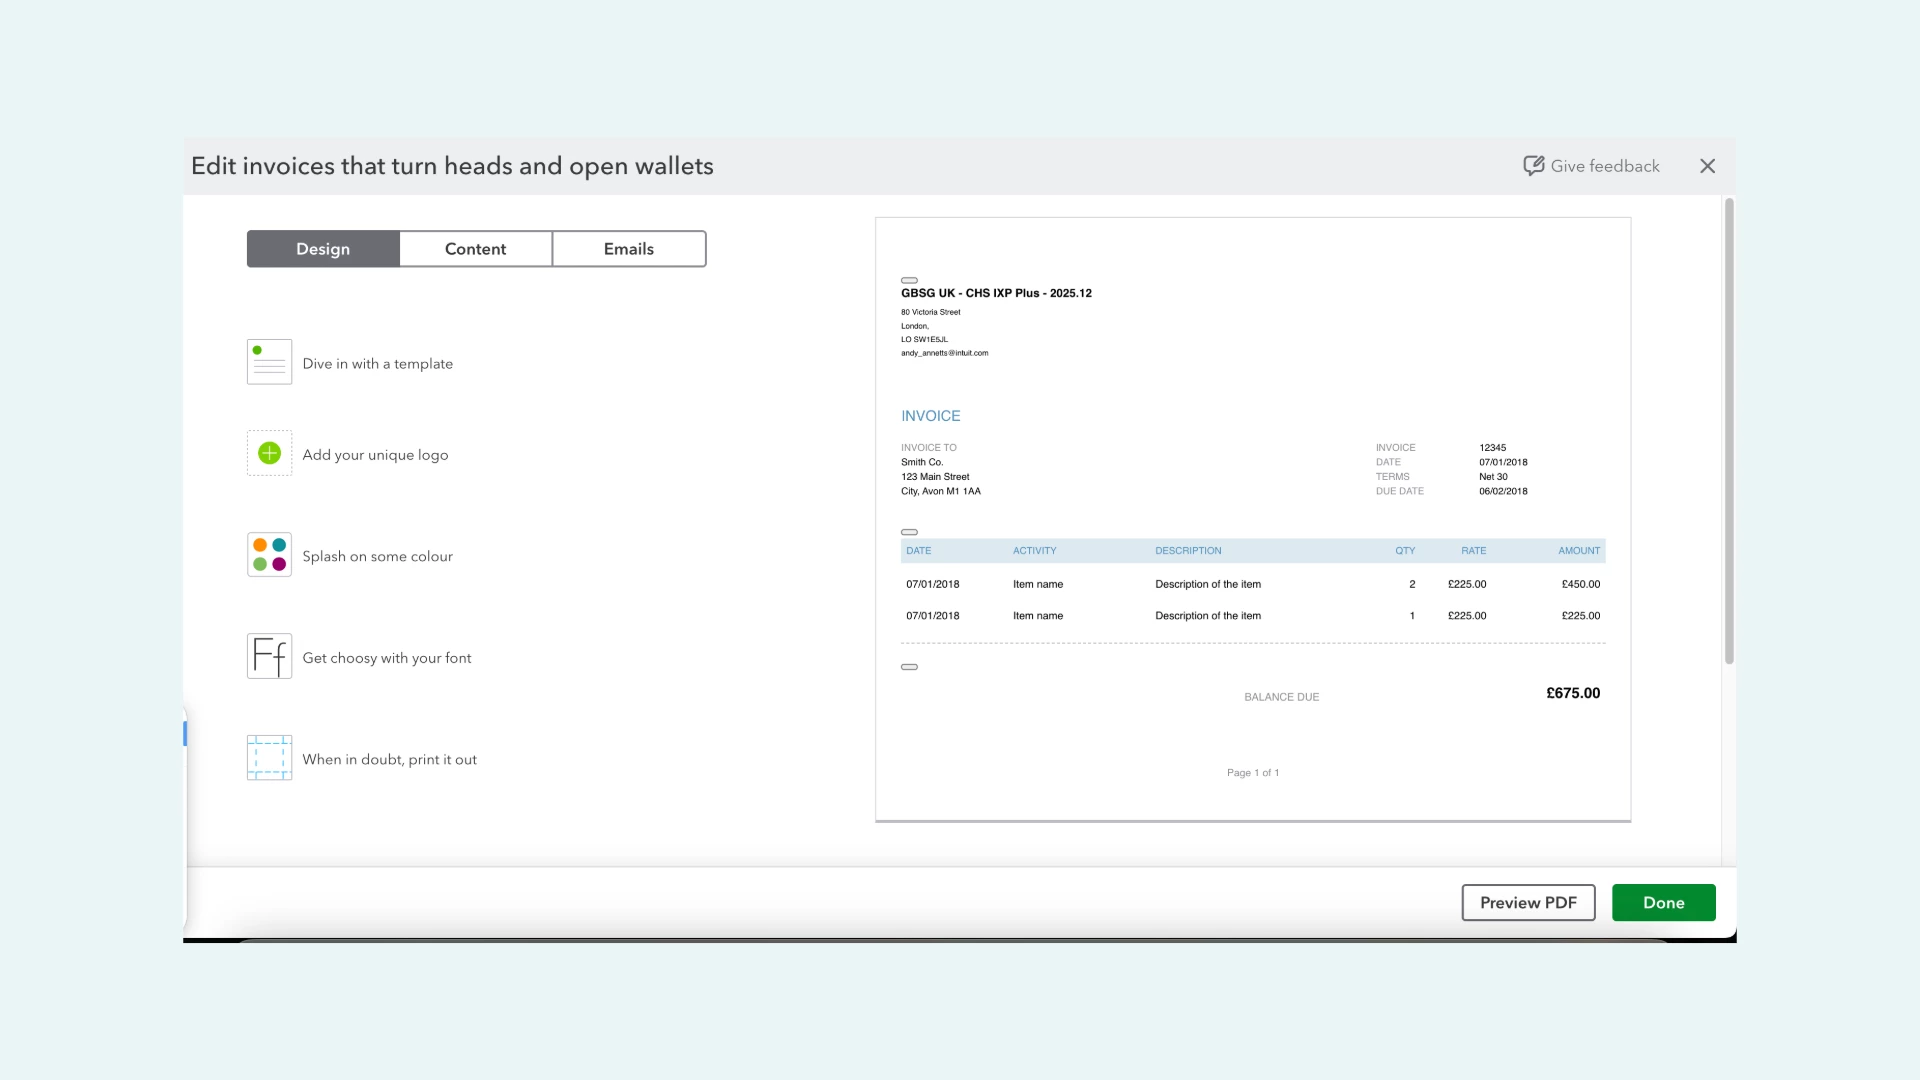
What this means for you: You can update your branding or switch templates without interrupting your workflow.
These updates are designed to give you a cleaner, more organised invoicing experience without changing the tools you rely on.
Need more support? Visit our Help Centre for detailed articles on how to create and send invoices and/or customise Invoices.
Have a question? Click ‘Post a Comment’